I use Home Assistant to control various smart devices around our home, including our Tesla Powerwall.
We are charged wholesale power prices by our electricity retailer Amber Electric, which means that sometimes the price of our power is really low, and sometimes it is really high. I can therefore use my battery to charge from the grid when the price is low, and sell back to the grid with the price is high.
Amber has a product called “Smart Shift” which can control when my battery buys and sells. It works reasonably well, but sometimes I prefer to control the battery myself, and have set up some automations to do this.

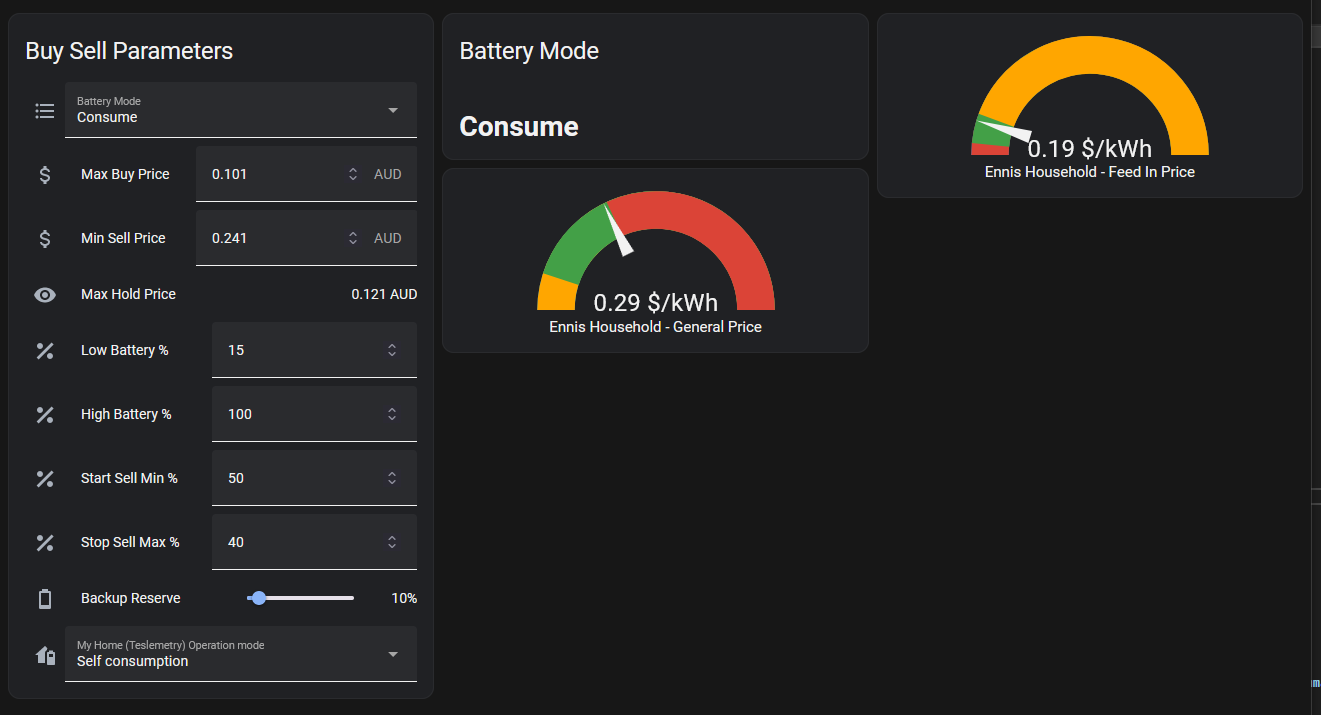
The end result is a simple panel when lets me set the Buy and Sell price, and how I’d like the battery to operate:
- How low will I let it discharge?
- How high will I let it charge?
- How full must the battery be before I sell power?
- How low should the battery charge drop before I stop selling power?
These things are defined in Home Assistant as Helpers. They’re basically variables that you can set.
I have three scripts which control the battery. They define standard actions which I’d like to run at different times:
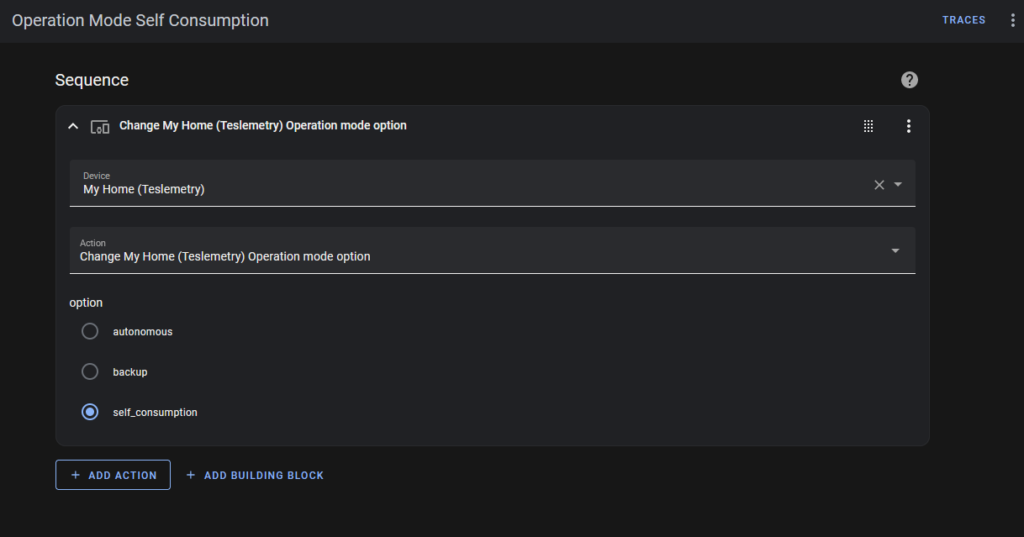
“Self Consumption” tells the battery to supply power to the house. When I don’t want to buy or sell or use grid power.
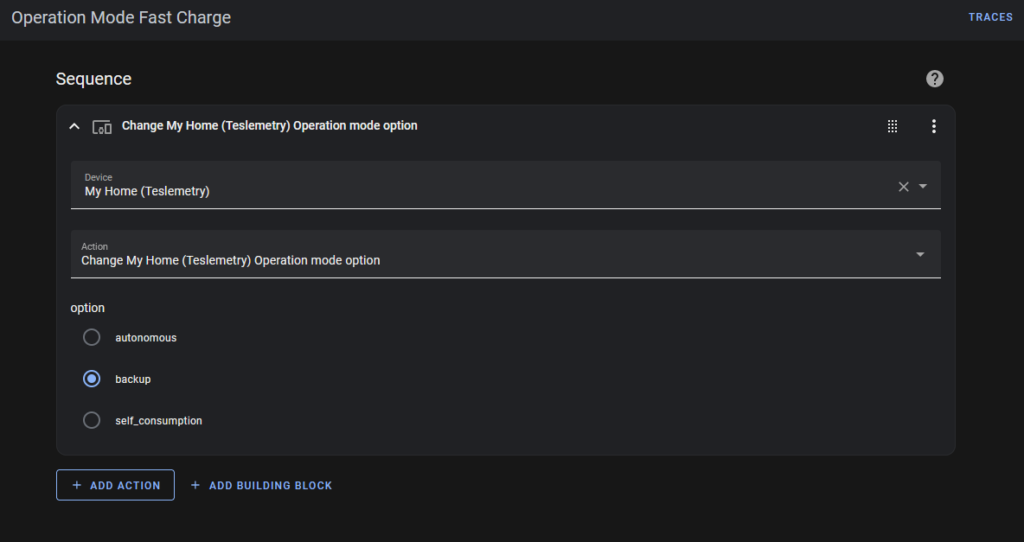
“Fast Charge” tells the battery to charge up from the grid – usually when the power price is cheap.
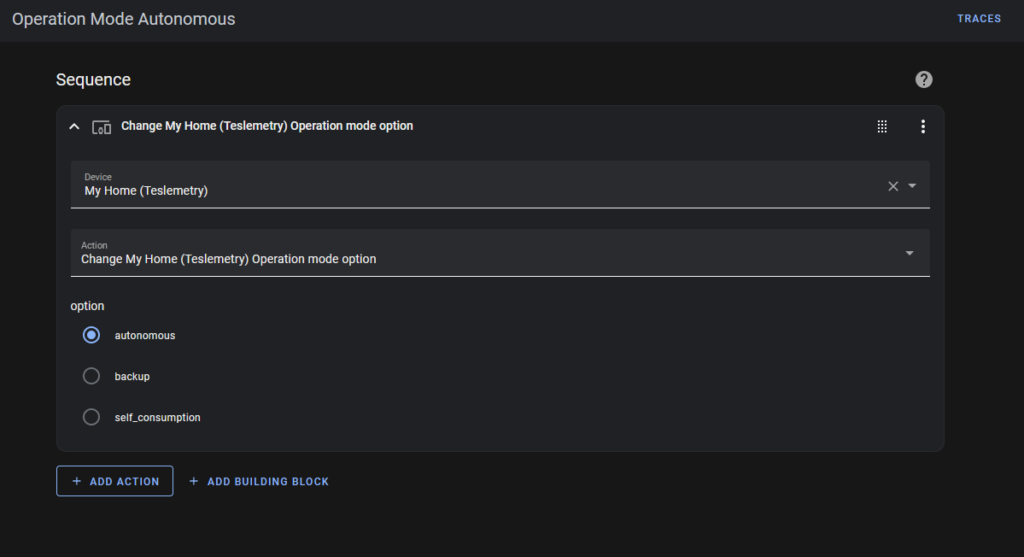
“Autonomous” tells the battery to look at the “Utility Rate Plan” in the Tesla settings, and decide whether or not to sell power.
The prices are artificial. I enter them via the Powerwall App. Basically they tell the Powerwall that power prices are expensive between 6:00am and 8:30am, and between 4:00pm and 9:00pm. Therefore if the battery ever switches to “Autonomous Mode” at these times, it will try to sell power. At other times, it will do nothing.
Based on this information I have set up four more scripts:
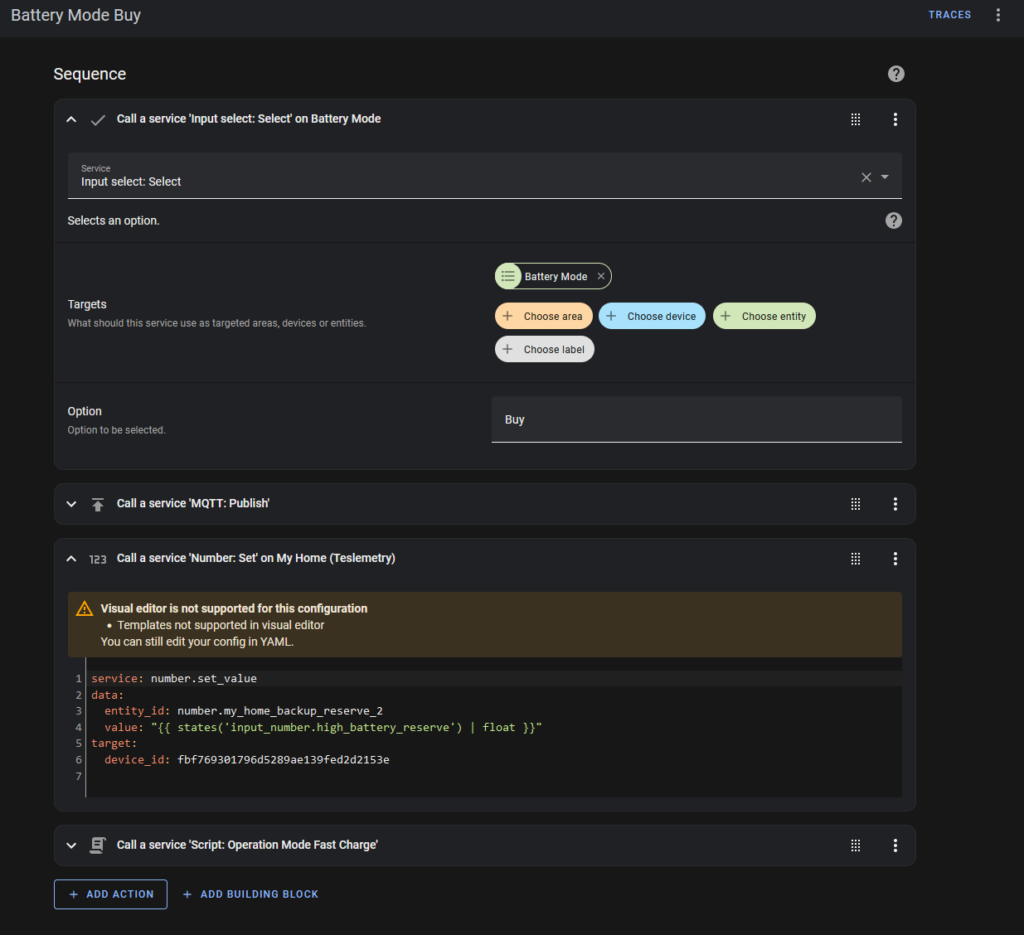
“Battery Mode Buy” does this:
- Change the Battery Mode helper to display “Buy”.
- Send me a message via MQTT
- Change the battery reserve to its maximum (usually 100%)
- Run the “Fast Charge” script.
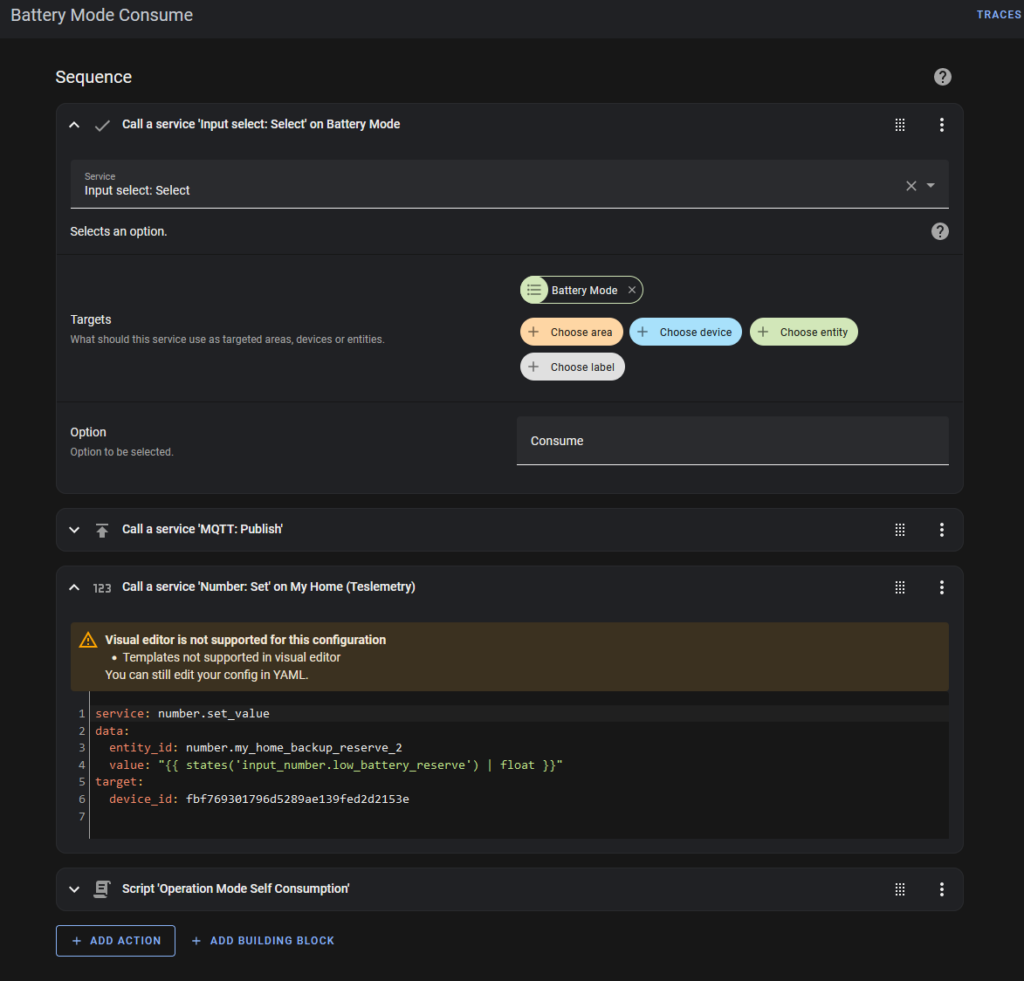
“Battery Mode Consume” does this:
- Change the Battery Mode helper to display “Consume”.
- Send me a message via MQTT
- Change the battery reserve to its minimum (usually 15%)
- Run the “Self Consumption” script.

“Battery Mode Hold” does this:
- Change the Battery Mode helper to display “Hold”.
- Send me a message via MQTT
- Change the battery reserve to its current charge level. This forces the battery to stay at this level, neither importing nor exporting.
- Run the “Self Consumption” script.
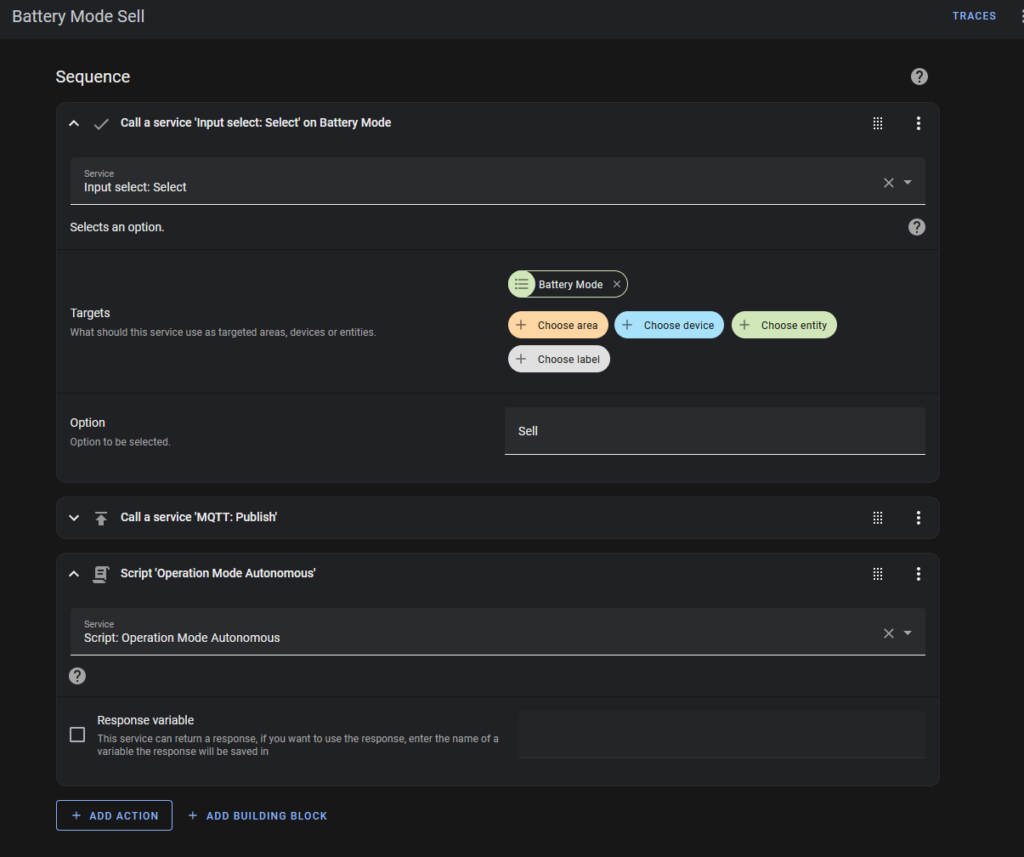
“Battery Mode Sell” does this:
- Change the Battery Mode helper to display “Sell”.
- Send me a message via MQTT
- Run the “Autonomous” script.
Now for the automations:
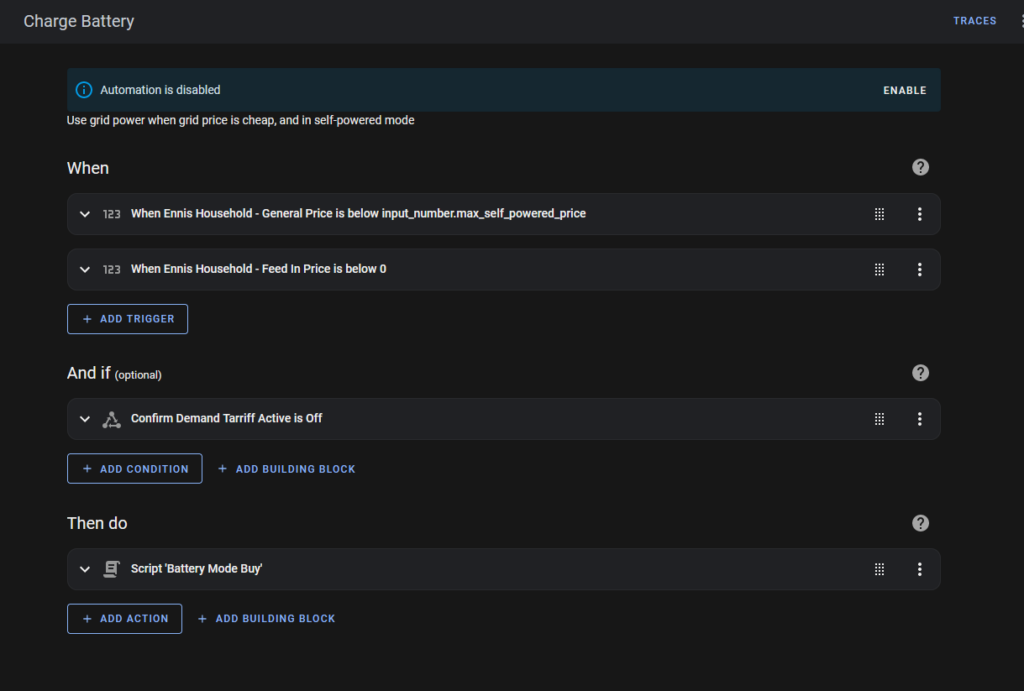
The “Charge Battery” automation is triggered by one of two events:
- If the general power price (from the Amber API) is less than my specified “Buy Price”, or
- The general power price (from the Amber API) is negative (some days they pay us to consume power)
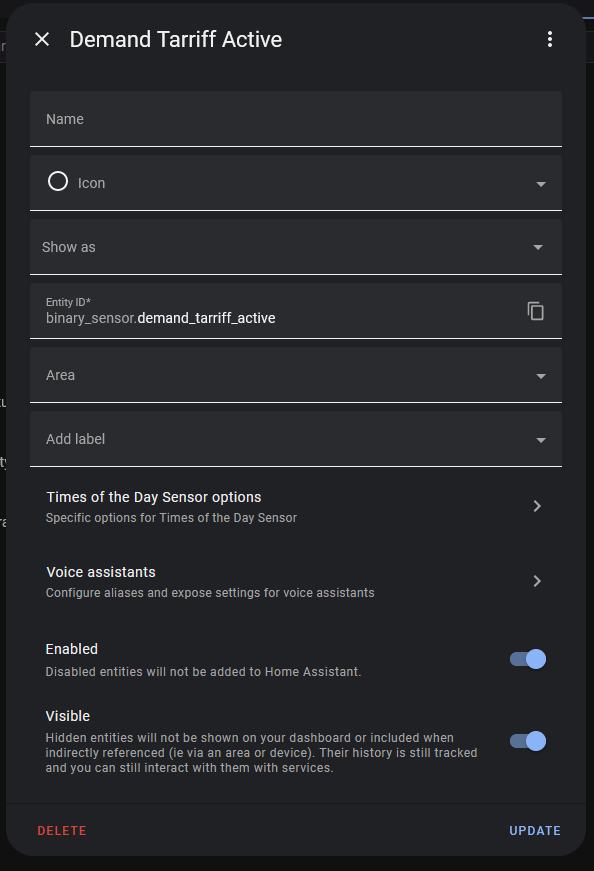
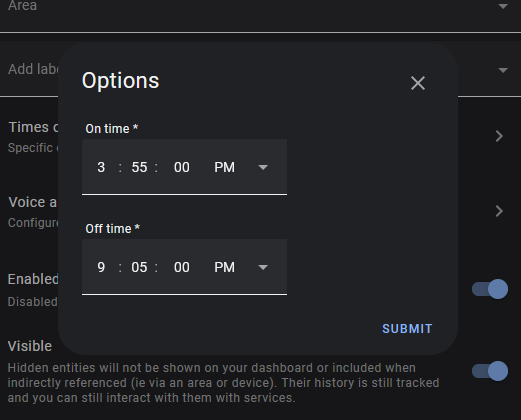
There is also a precondition, which must be true: The “Demand Tariff” must not be active. We get charged additional fees for any consumption during the demand period, so I try to avoid consumption at that time.
“Demand Tariff Active” is a binary sensor helper:
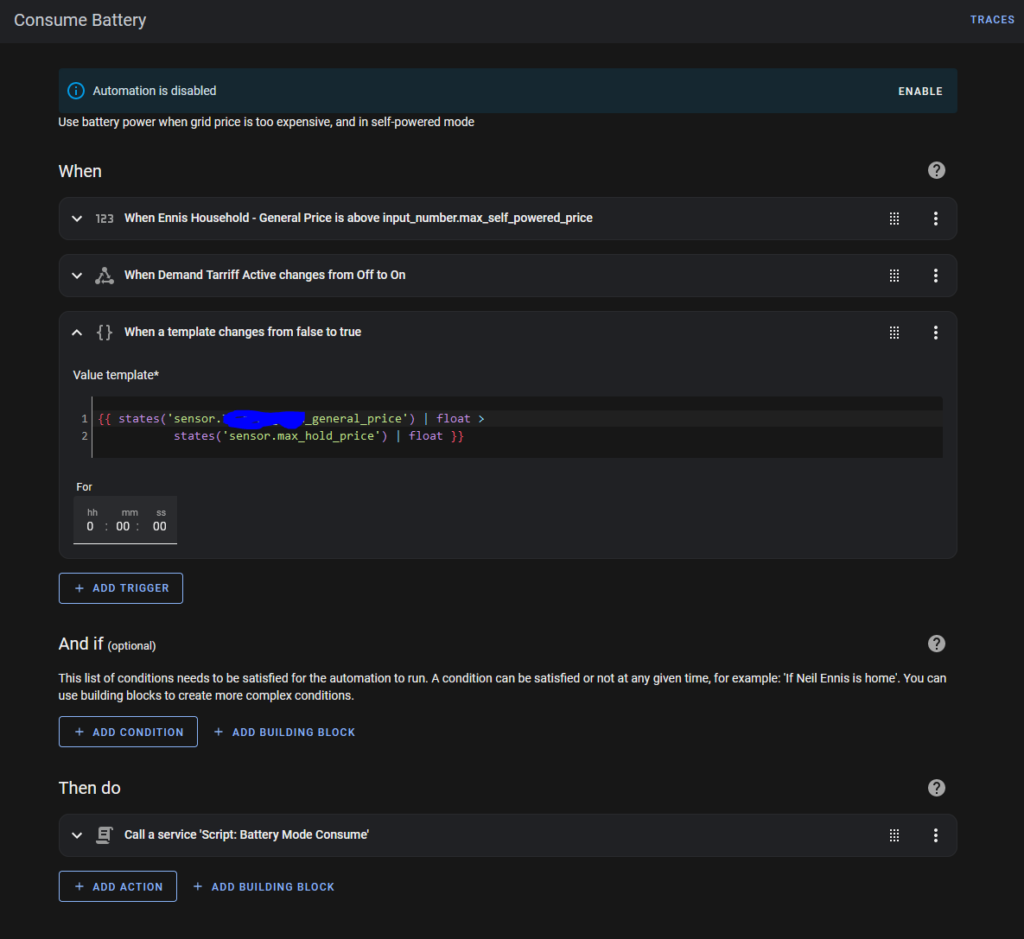
The “Consume Battery” Automation is triggered by one of three events:
- The Power Price exceeds the “Buy Price”
- The “Demand Tariff” changes from OFF to ON
- The Power Price exceeds the “Max Hold Price”
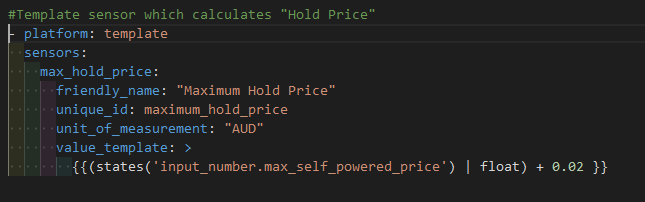
“Max Hold Price” is a binary sensor variable I set up in “sensor.yaml”:
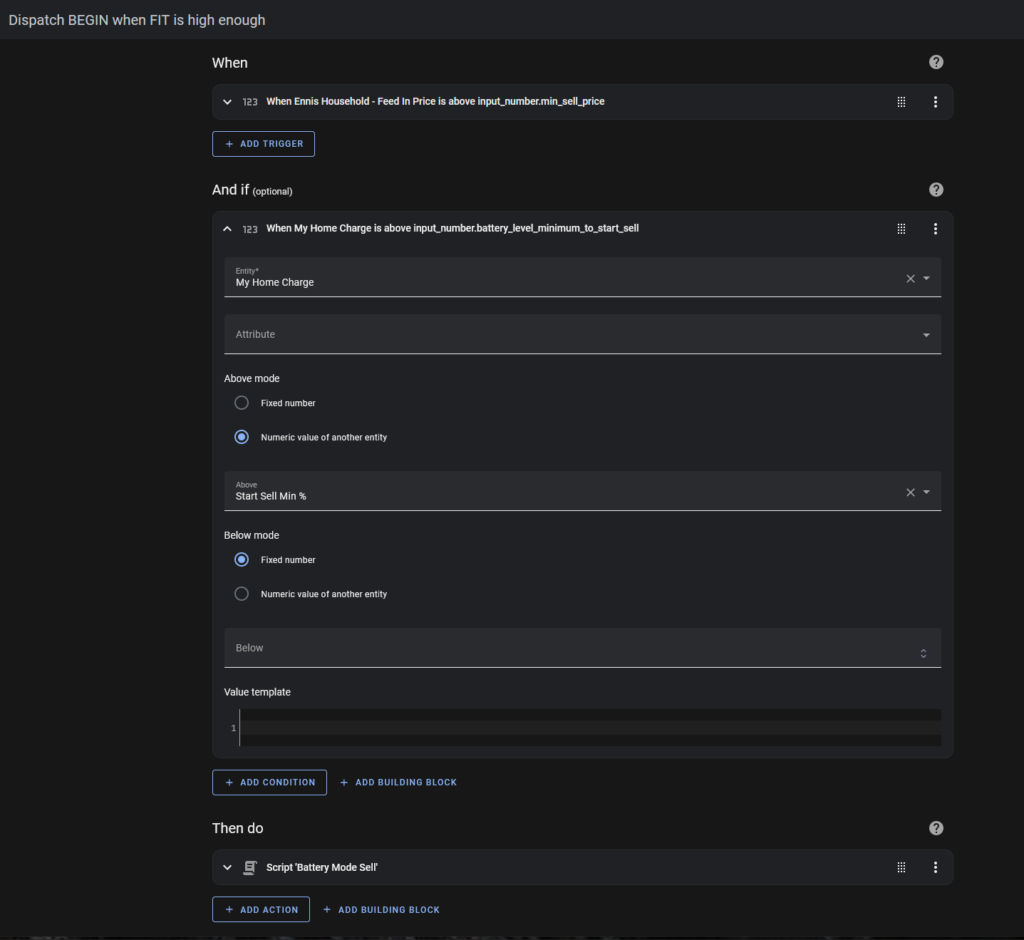
The “Dispatch Begin” (Start Selling) automation is triggered whenever the Feed In Tariff is higher than my minimum sell price.
It will only run if the battery level is above the minimum “sell” charge level, which I have currently set to 60%.
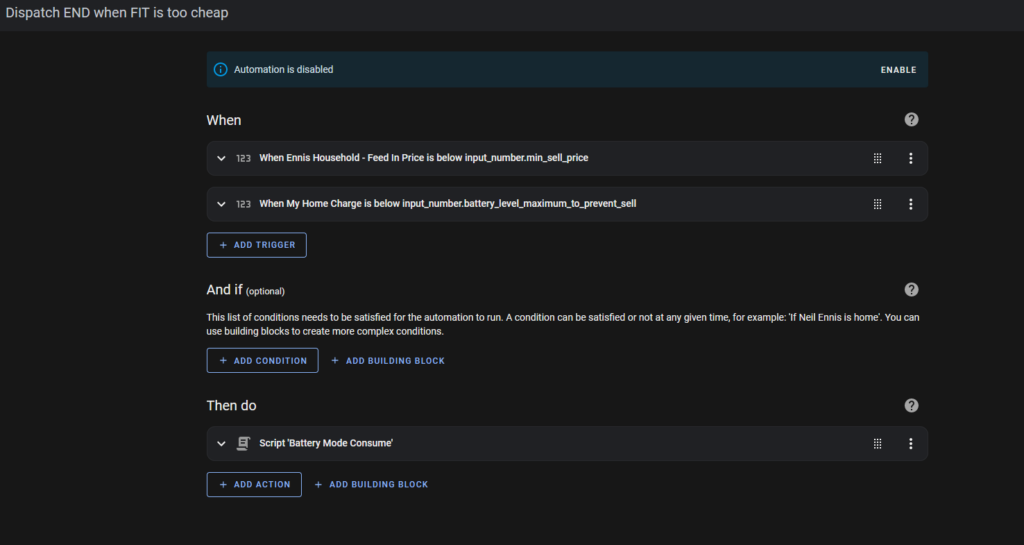
The “Dispatch End” (Stop Selling) automation is triggered by one of two events:
- The “Feed In Price” falls below my “Sell Price”, or
- The Battery Charge Level falls below my minimum charge percentage (currently 40%).
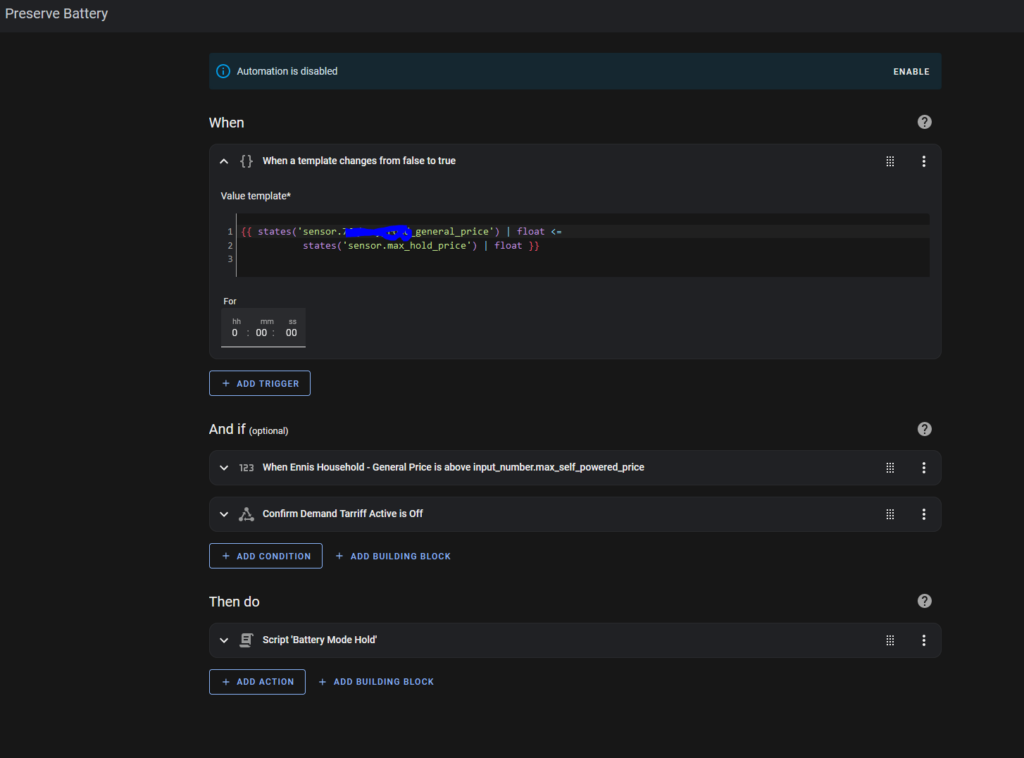
The “Preserve Battery” Automation is triggered whenever the power price falls below the maximum hold price.
The power price must be above my “Buy” price (otherwise I’d be buying, not preserving), and the Demand Tariff must be off.
All of these automations rely on the “Teslemetry” integration which gives me greater control over my battery than the standard Tesla integration. It’s a paid service, but it’s cheap, and it always works.
If you need me to clarify anything, please leave a comment.